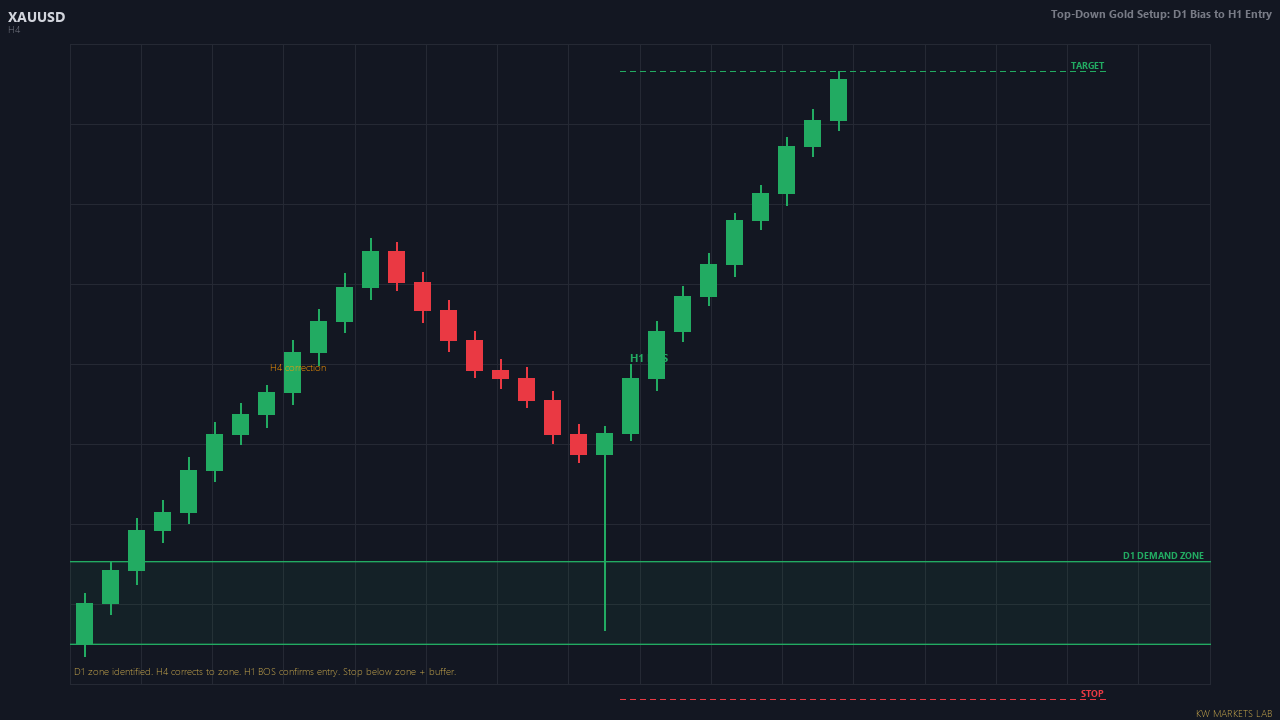
L2.1 — The Top-Down Gold Setup: Daily Bias to H1 Entry
The top-down gold setup follows the same cascade used in the Market Structure course, adapted for gold's characteristics. Daily chart: establish directional bias — is structure bullish, bearish, or ranging? Where is the next major structural level in the bias direction? H4: is price in a pullback or continuation phase within the daily bias? Identify the H4 demand/supply zone. H1: wait for an H1 BOS in the bias direction within the H4 zone as your entry trigger.
The adaptation for gold: the H4 zones on gold are typically wider than on forex. A demand zone may span 50-80 gold pips rather than 15-20. This is not sloppiness — it is gold's nature. Mark the zone with its full realistic width rather than compressing it to a single line, and accept that entries within the zone may be at different exact prices each time.
The highest-probability gold setups occur when the daily bias, H4 zone, and H1 BOS all align with a macro tailwind (DXY direction). When all four factors are aligned, the quality of the setup justifies a full-risk allocation. When only two or three are aligned, reduced risk or a tighter confirmation requirement is appropriate.
Get notified when new lessons and content are published.